When it comes to overall health care of your cat, don’t miss the ears. These are the most crucial parts that need to be inspected weekly for proper cleansing, neglecting which can lead to ear infection. Moreover, if you are new to cat care and have no idea how to clean your cat’s ears, don’t feel disheartened. A detailed guide over here can throw much light and can you help learn the process step by step.
Cat’s ear health is of great importance for every cat owner.
On the outside, your kitty’s curious ears would look mighty and all alluring. However, it is not always the same thing. What lies inside or what appears abnormal outside is a matter of concern. Your kitty’s ears have to be spotless or should have no red spots. Moreover, if you find that the area around the ears looks pinkish for light colored cats or if you see swelling, bad odor, yellowish liquid oozing out or bald spots, then it is a warning sign of ear infection, which needs to be addressed immediately talking to your vet.
Your cat’s ears require regular cleaning in order to prevent ear infections that can put your kitty into a lot of pain and suffering. Therefore, follow a regime that can help you maintain your cat’s ear health. However, if you’re not well acquainted with ear cleansing procedure or want to figure out how to clean your cat’s ears, then don’t succumb to ignoring your cat’ ear health. This will do no good rather it would be helpful if you learn the procedure and follow it to keep your cat’s ears clean and healthy.
So, work on this step-by-step process for cleaning your cat’s ears.
Steps To Clean Your Kitty’s Ears
- Hold your kitty in your lap while you’re sitting comfortably. Wrapping her in a towel and little caressing will help for easy cleaning if she is reluctant to cleaning ears.
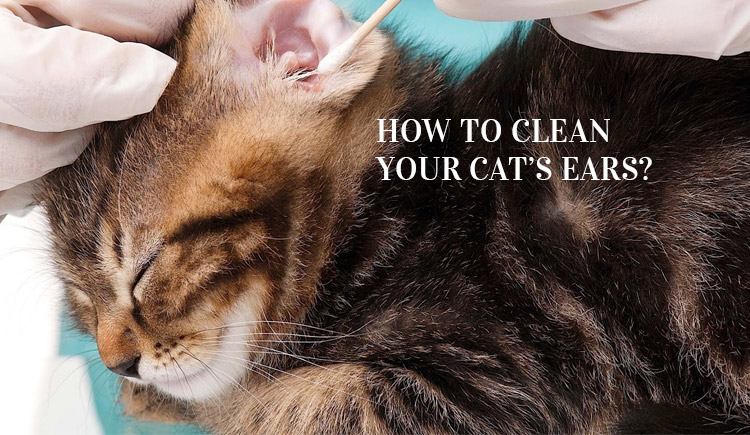
- Hold the tip of the ear flap pulling back slightly to expose the ear canal and to help straighten the ear canal out.
- While holding your cat’s ear flap gently and firmly with one hand, hold the ear cleansing solution with another hand.
- As per the directions are given on the ear cleansing solution pack, put drops of solution into your cat’s ear. Pour enough ear solution so that it fills the ear canal. It is fine if a little solution spills
- Ensure that while applying the solution, you do not put the nozzle of the bottle into the ear.
- In case the nozzle touches the ear, wipe it off with clean cotton wool to avoid the spread of yeast and bacteria.
- Also, take care that you are gentle while applying the solution and do not hurt your kitty’s ears.
- Continuously holding the ear flap with one hand, slowly massage at the base of the ear below the ear hole for approx.30 seconds on the other hand.
- This helps in breaking up the hardened wax and debris in the ear canal.
- After some time, you will find that the debris is loosening up and coming up to the surface. Taking a clean cotton ball to wipe away debris from the inner part of the ear flap and the upper ear canal.
- Allow your cat to shake her head. This helps to further remove the loosened debris and cleansing solution to move out of the canal to the outer canal.
- Again take the cotton wool and cleanse the loosened debris and remaining cleansing solution from the ear canal.
- Never use Q-tips (cotton-tipped applicator) to cleanse or remove debris from your cat’s ear. This can damage the ear canal or eardrum or push debris further down the canal.
- Once the process is finished provide a treat to your cat. This encourages your cat to remain calm and stable during the next ear cleansing process.
- Now, continue with the other ear of your cat following the same principle.
- If you find that your cat is in pain during the cleansing procedure, immediately stop and consult your vet.
- Carry your cat’s ear cleaning regime once in two weeks or as often as your vet’s advice.
In case your cat is suffering from an ear infection, then it is crucial to apply medication after cleansing.
Step-By-Step Guide For Application of Medication in Cat’s Ears
Application of medication can be followed after cleansing.
- Your vet will direct you how much medication has to be applied and at what intervals.
- Hold the tip of the ear flap and pull back gently to expose the ear canal and help straighten the ear canal.
- Pour the number of drops as per your vet’s recommendations.
- Ensure that the nozzle of the bottle does not touch the ear canal. And if it does, then clean it properly by cotton wool so that the bacteria or yeast are not spread.
- While holding the ear canal, gently massage at the base of the ear for 30 seconds. This allows the medication to spread through the ear canal.
- If required apply the prescribed solution on the outer part or on the infected part of the ear flap.
- Repeat the same procedure with the other ear.
- If medication or debris is accumulated on the outer part of the ear, it can be wiped out gently away with a cotton ball soaked in an ear cleansing solution.